Description
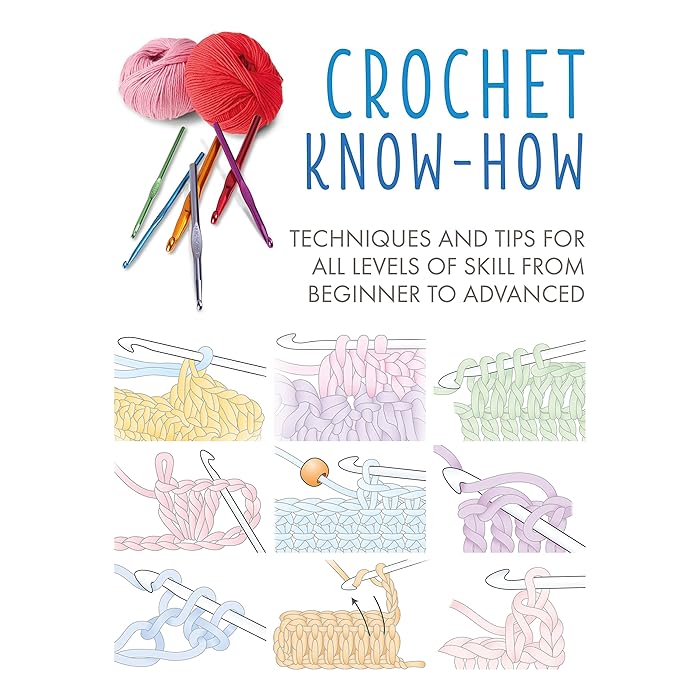
**Crochet Know-How: A Beginner’s Guide**
Crochet is a versatile and creative craft that involves using a hook to interlock yarn into a series of loops. Whether you’re making cozy blankets, cute amigurumi toys, or stylish accessories, crochet offers endless possibilities. Here’s a quick guide to help you get started with crochet.
### 1. **Basic Tools & Materials**
– **Crochet Hook**: Available in various sizes, typically made from metal, plastic, or wood. The hook size depends on the yarn you’re using. For beginners, a medium-sized hook (such as size H-8 or 5mm) works well.
– **Yarn**: Yarn comes in many types, including cotton, wool, and acrylic, with varying thicknesses. Beginners often start with a medium weight yarn (like worsted weight).
– **Scissors**: To cut your yarn when finished.
– **Tapestry Needle**: Used for weaving in loose ends of yarn.
### 2. **Basic Crochet Stitches**
Here are a few foundational crochet stitches:
– **Slip Knot**: The first step to start crocheting. It forms the loop on your hook.
– To make a slip knot, create a loop with the yarn, then pull the working yarn through the loop to form a knot.
– **Chain Stitch (ch)**: This is the foundation stitch. You’ll use it to create the starting chain.
– To create a chain, yarn over (wrap the yarn over the hook) and pull through the loop on your hook.
– **Single Crochet (sc)**: A basic stitch used in many projects.
– Insert the hook into the stitch, yarn over, pull up a loop, yarn over again, and pull through both loops on the hook.
– **Double Crochet (dc)**: A taller stitch that adds more height to your work.
– Yarn over, insert the hook into the stitch, yarn over again, pull up a loop, yarn over and pull through the first two loops, yarn over and pull through the remaining two loops.
### 3. **Reading Patterns**
Crochet patterns use abbreviations for stitches and instructions, so learning how to read them is essential. Here’s a basic example:
– **ch 10**: Chain 10.
– **sc in 2nd ch from hook**: Single crochet in the second chain from the hook.
– **turn**: Flip your work to the other side.
– **repeat**: Repeat a sequence of stitches for a specified number of times.
### 4. **Basic Techniques**
– **Turning**: After completing a row, you often need to “turn” your work, meaning you rotate it to start a new row. Some stitches, like double crochet, may require an extra turning chain (like ch 3) to maintain the proper height for the next row.
– **Joining Yarn**: When you run out of yarn, you can join a new strand by placing it next to the working yarn, holding both together as you continue stitching.
– **Finishing**: When you complete a project, weave in the loose ends using a tapestry needle to secure the yarn.
### 5. **Helpful Tips for Beginners**
– **Tension**: Keep your yarn tension consistent. Too tight can make stitches difficult to work into, and too loose can cause gaps.
– **Practice**: Start with simple projects like scarves or dishcloths to get comfortable with holding the yarn and making stitches.
– **Stitch Markers**: Use stitch markers to keep track of the beginning of your rows or where to place specific stitches.
### 6. **Projects to Try**
– **Granny Squares**: Classic crochet motifs that can be joined together to make blankets or other items.
– **Scarves and Cowls**: Simple, quick projects that use basic stitches like single or double crochet.
– **Amigurumi**: Small, crocheted toys or creatures, typically worked in the round.
– **Blankets**: Once you’re comfortable with the basic stitches, you can create cozy blankets by working back and forth in rows or in the round.
### 7. **Crochet Resources**
– **Online Tutorials**: Websites, YouTube channels, and online classes can guide you through each stitch and pattern.
– **Crochet Communities**: Join crochet groups on social media for inspiration, tips, and support from fellow crocheters.


Reviews
There are no reviews yet.